GAM Step by Step - Native Creatives
- Overview
- Create a Native Ad Template
- Create a New Native Creative
- Create Mobile In-App Template
- Attach the Creative to Your Line Item
- Further Reading
Overview
This page walks you through the steps required to set up native ads in GAM for these scenarios:
- Create a native ad template within the Google Ad Manager (GAM) native design tool.
- Prebid Mobile In-App native
You don’t necessarily need to use GAM’s native design tool. If you’re using Prebid.js and have chosen to use in-adunit or external native templates, the recommended ad ops workflow is to use a Prebid.js dynamic creative rather than Prebid Universal Creative (PUC).
For complete instructions on setting up Prebid line items in Google Ad Manager, see Google Ad Manager with Prebid Step by Step.
For more information about Google Ad Manager native ad setup, see the Google Ad Manager native ads documentation.
Create a Native Ad Template
- In GAM, select Delivery > Native.
- Click New native ad and select Single ad.
For information on the Multiplex ad option, see the Traffic Multiplex ads GAM documentation.
- Under HTML & CSS editor, click Select. This will slide out the New native style window.
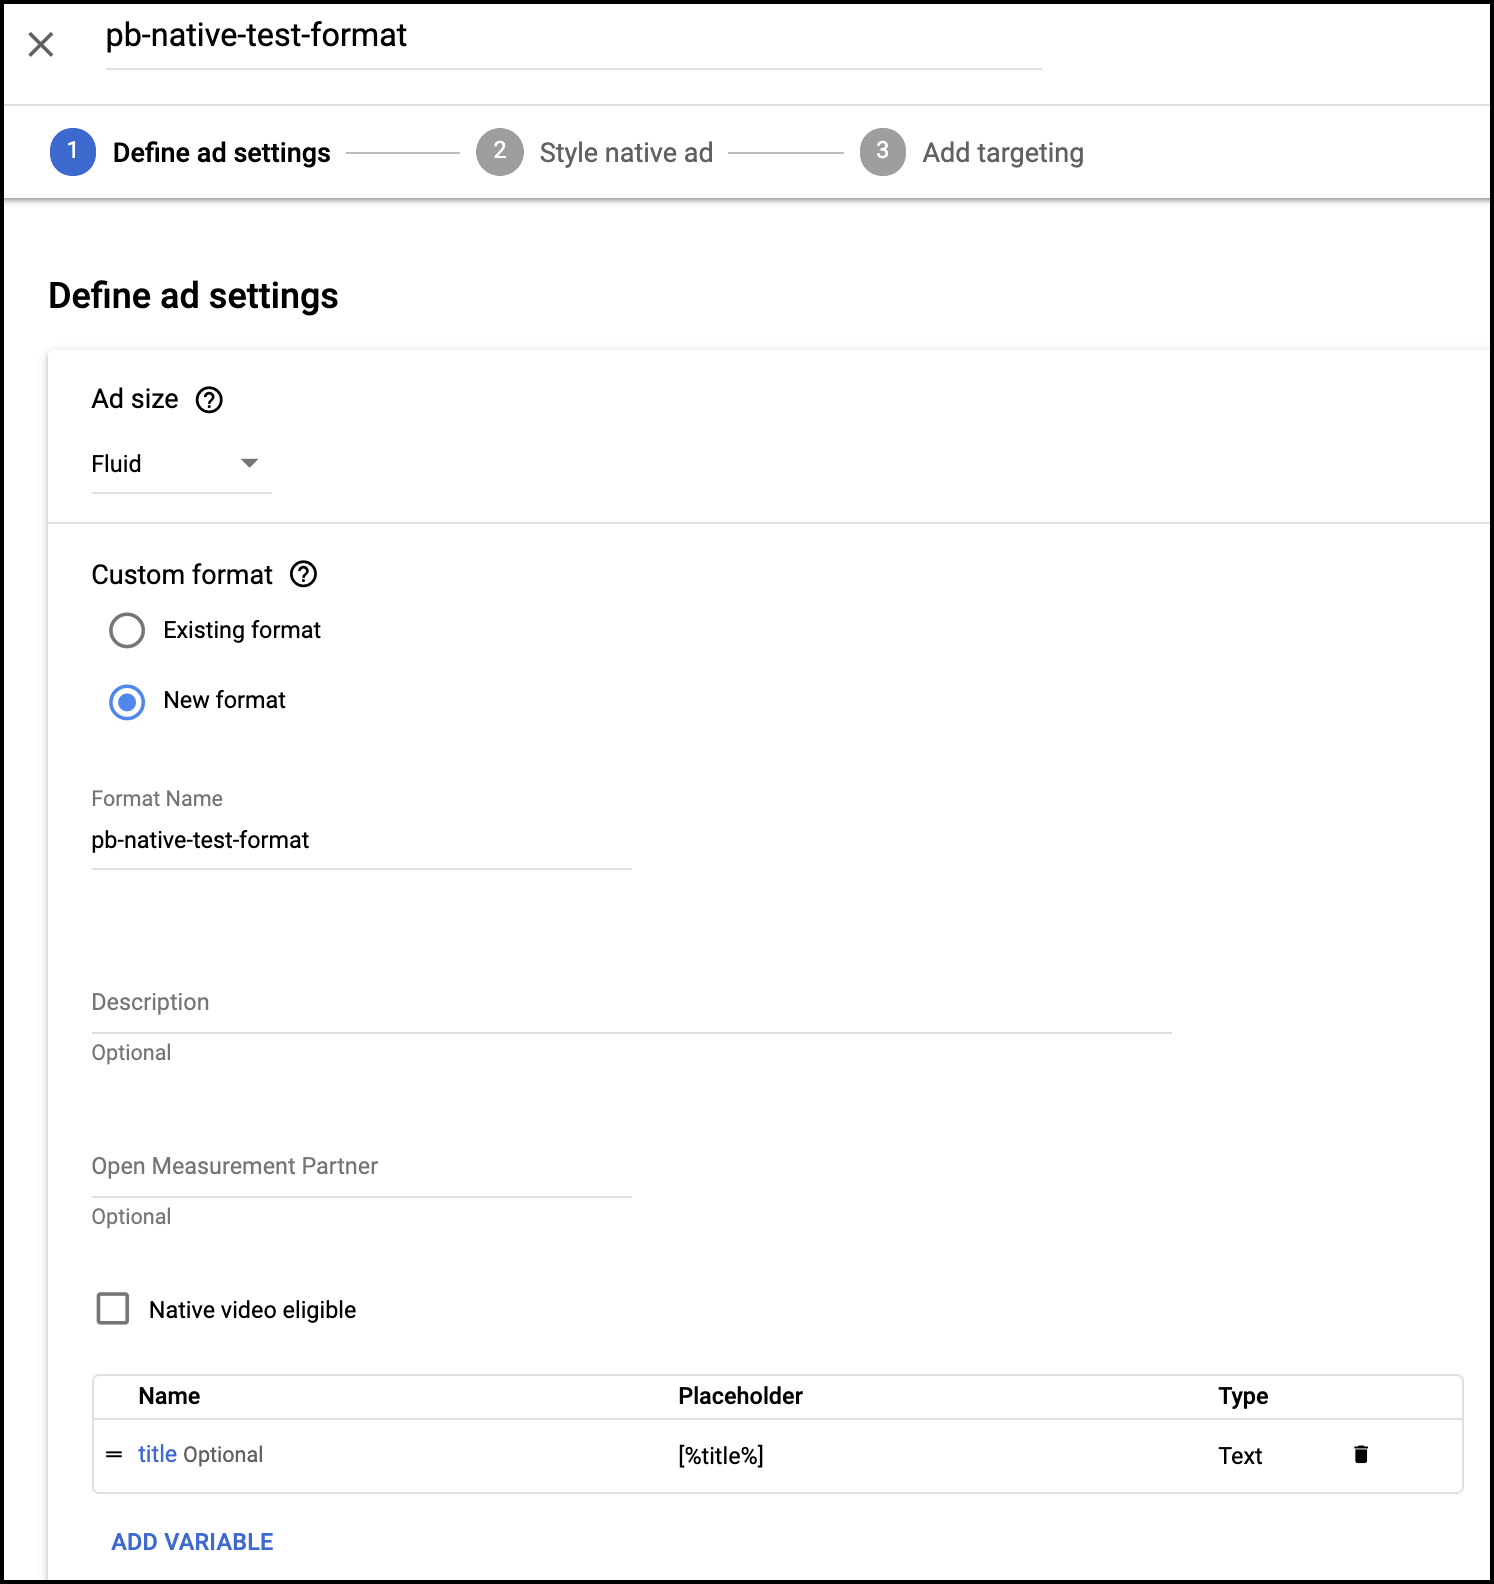
Define Settings for Native Format
- Under Ad size you can select a specific size for the ad unit or specify the “fluid” size. In this case we’ll go with Fluid.
- Under Custom format, select New format. (If you’ve already created an ad unit with the format you want, you can select Existing format and select the format to apply to this ad unit.)
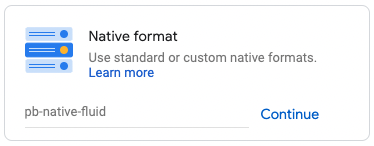
- Enter a Format name, such as
pb-native-fluid. - Click Add variable. This will slide out the New variable window.
Every format needs at least one variable. Don’t worry, you can add more later. GAM requires at least one variable in order to move on to the next step.
- Type in a Variable name. In this example, we’ve used the name
title. - Click OK.
7.Click Continue.
Style Your Native Ad
- The first step in styling your native ad is to add the HTML and CSS to define your native ad template. To allow for trackers, titles, images, and other assets within a Prebid native creative template, you’ll need to include a CDN-hosted script in the HTML.

Any link that needs to fire a click tracker must include class='pb-click'.
If this creative is served, it will fire impression trackers on load. Clicking the link will fire the click tracker and the link will work as normal, in this case going to the hb_native_linkurl destination.
The creative template HTML will depend on which of the three scenarios you’re implementing. You can choose to manage the native template in one of these ways:
- in GAM (Managing the Native Template in GAM below)
- in the Prebid.js AdUnit, handled as a third-party HTML creative using the Prebid.js dynamic creative workflow
- in a separate JavaScript file, handled as a third-party HTML creative using the Prebid.js dynamic creative workflow
For engineering instructions, see Native Implementation Guide.
- After entering your HTML and CSS per the approriate instructions below, click Continue.
- Add any targeting you want to apply and click Save and activate (or Save if you’re not yet ready to activate your template.)
- Provide a Name for your native style and click Save.
Managing the Native Template Outside of GAM
If your native template is defined in the Prebid.js AdUnit or in a separate JavaScript renderer, set up the ad server creative with the Prebid.js dynamic creative. This is the recommended browser workflow for Prebid.js native ads because the creative asks Prebid.js to render the winning bid directly instead of loading PUC.
Use this workflow when all of the following are true:
- the line item targets browser inventory where Prebid.js is present on the page;
- your Prebid.js bundle includes the nativeRendering module;
- you are using Prebid.js 8.36 or later.
For GAM, create a third-party HTML creative and paste the dynamic creative from the
Prebid.js dynamic creatives guide. Keep the GAM macros in the
second script block. In Send All Bids setups, replace %%PATTERN:hb_adid%% with the bidder-specific
%%PATTERN:hb_adid_BIDDERCODE%% value for each bidder creative, truncating the key name as required
by GAM.
Dynamic creatives are for Prebid.js browser line items. Continue to use the GAM native design-tool workflow below when GAM owns the native template, and use the mobile in-app workflow for Prebid Mobile.
Managing the Native Template in GAM
There are three key aspects of the native template:
- Build the creative with special Prebid.js macros, e.g.
##hb_native_assetname##. Note that macros can be placed in the body (HTML) and/or head (CSS) of the native creative. - Load the Prebid.js native rendering code. You can utilize the jsdelivr version of native.js or host your own copy. If you use the version hosted on jsdelivr, make sure to declare jsdelivr as an ad technology provider in GAM. (Go to Privacy & messaging and click the Settings icon under GDPR. Under Review your ad partners click into Commonly used ad partners.) See Step 6 under Create a New Native Creative below.
- Invoke the Prebid.js native rendering function with an object containing the following attributes:
- adid - Used to identify which Prebid.js creative holds the appropriate native assets.
- pubUrl - The URL of the page, which is needed for the HTML postmessage call.
- requestAllAssets - Tells the renderer to get all the native assets from Prebid.js.
Example creative HTML:
<div class="sponsored-post">
  <div class="thumbnail" style="background-image: url(##hb_native_image##);"></div>
  <div class="content">
    <h1><a href="%%CLICK_URL_UNESC%%##hb_native_linkurl##" target="_blank" class="pb-click">##hb_native_title##</a></h1>
    <p>##hb_native_body##</p>
    <div class="attribution">##hb_native_brand##</div>
  </div>
</div>
<script src="https://cdn.jsdelivr.net/npm/prebid-universal-creative@%%PATTERN:hb_ver%%/dist/%%PATTERN:hb_format%%.js"></script>
<script>
    var pbNativeTagData = {};
    pbNativeTagData.pubUrl = "%%PATTERN:url%%";
    pbNativeTagData.adId = "%%PATTERN:hb_adid%%";
    // if you're using 'Send All Bids' mode, you should use %%PATTERN:hb_adid_BIDDERCODE%%;
    pbNativeTagData.requestAllAssets = true;
    window.ucTag.renderAd(document, pbNativeTagData);
</script>
When using Send All Bids, use pbNativeTagData.adId = "%%PATTERN:hb_adid_BIDDERCODE%%"; rather than pbNativeTagData.adId = "%%PATTERN:hb_adid%%"; for each bidder’s creative, replacing BIDDERCODE with the actual bidder code, such as %%PATTERN:hb_adid_BidderA%%.
Example CSS:
.sponsored-post {
    background-color: #fffdeb;
    font-family: sans-serif;
    padding: 10px 20px 10px 20px;
}

.content {
    overflow: hidden;
}

.thumbnail {
    width: 120px;
    height: 100px;
    float: left;
    margin: 0 20px 10px 0;
    background-image: url(##native_image##);
    background-size: cover;
}

h1 {
    font-size: 18px;
    margin: 0;
}

a {
    color: #0086b3;
    text-decoration: none;
}

p {
    font-size: 16px;
    color: #444;
    margin: 10px 0 10px 0;
}

.attribution {
    color: #fff;
    font-size: 9px;
    font-weight: bold;
    display: inline-block;
    letter-spacing: 2px;
    background-color: #ffd724;
    border-radius: 2px;
    padding: 4px;
}
Create a New Native Creative
Now that you’ve defined your native template you can create your native creatives.
- Select Display > Creatives and click New creative.
- Select your advertiser.
- Under Native Format select the native template you just created and click Continue.
- Under Settings, enter a Name for your creative.
- Enter any value into the Click-through URL field; this value will be overwritten by the native asset values. Also, if you operate in Europe and are using the jsdelivr-hosted native.js, make sure you set jsdelivr as your ad technology provider. (See Step 6 below.)
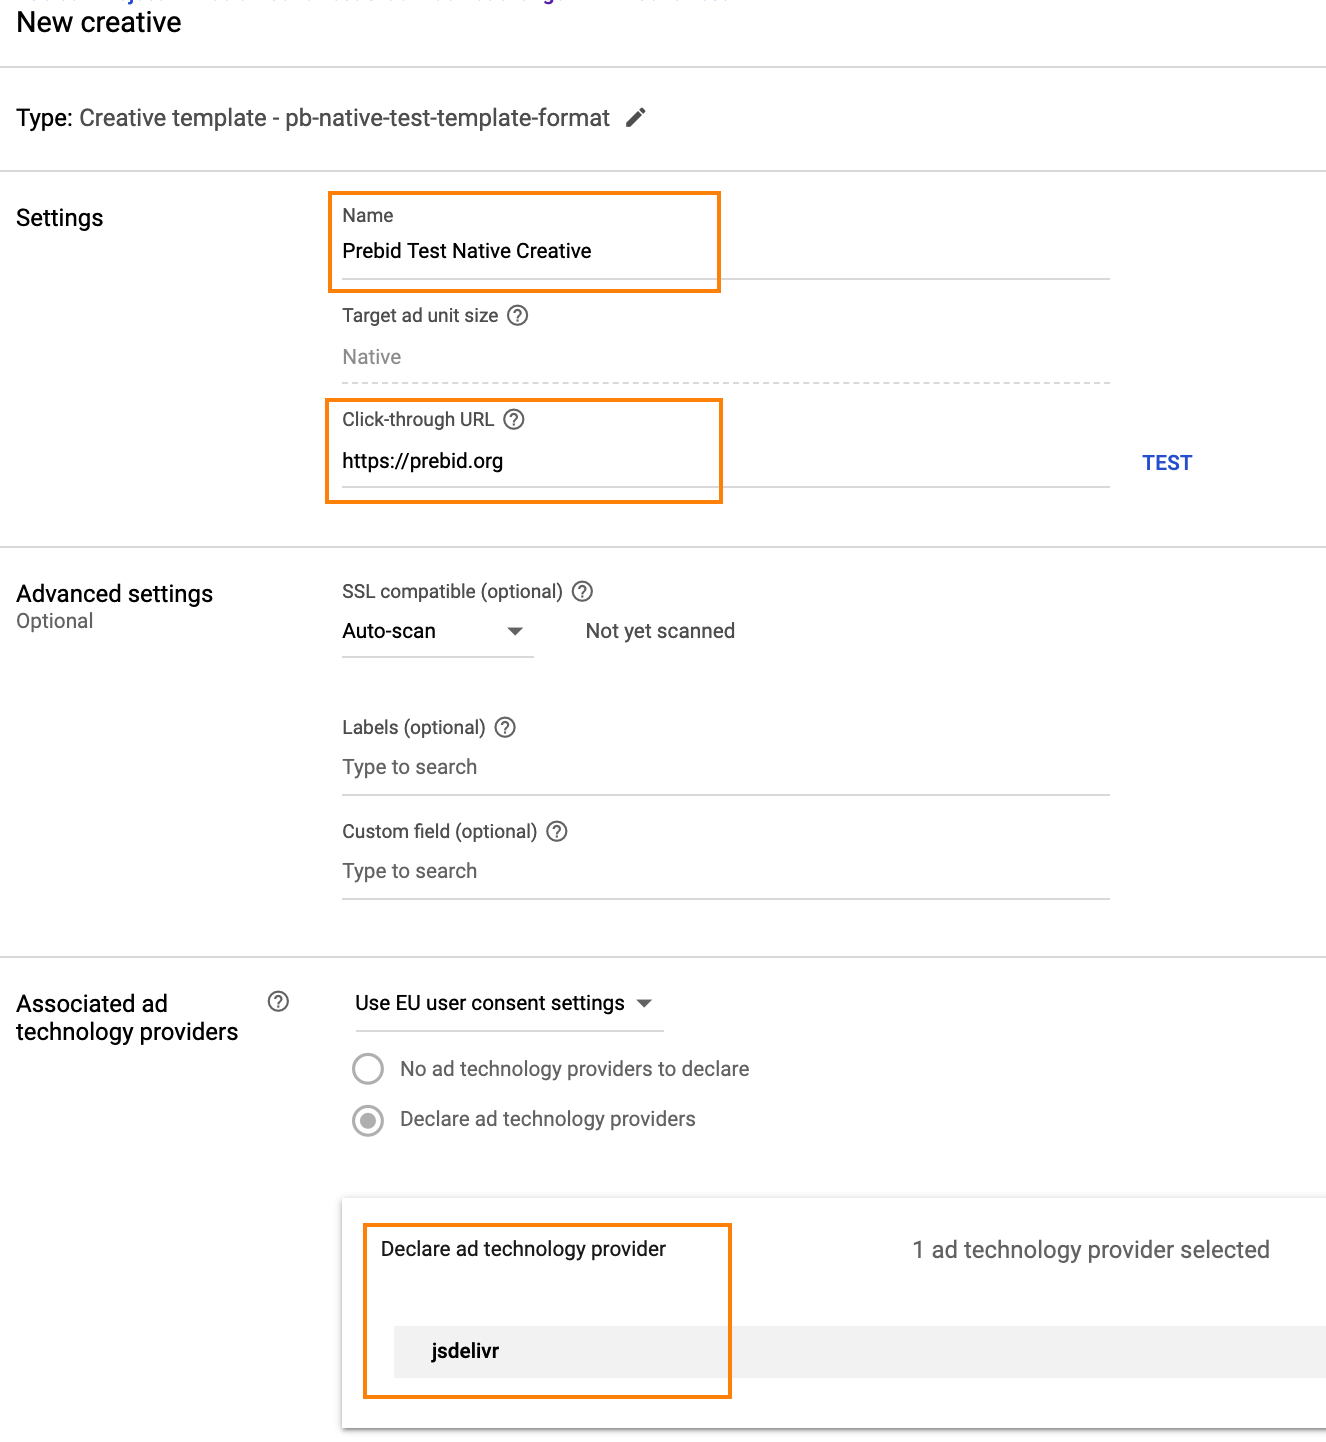
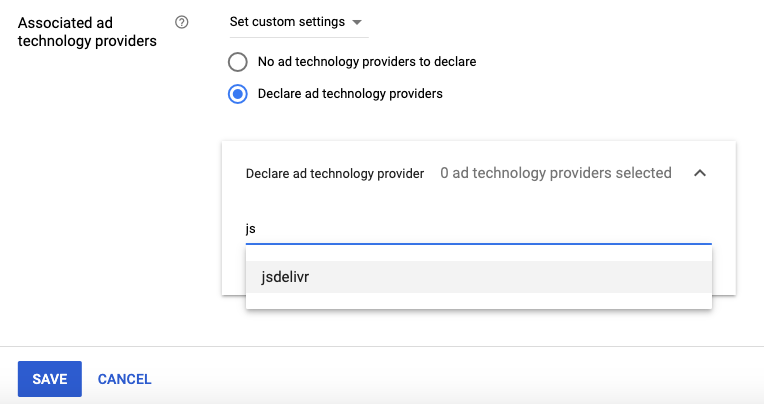
- If you’re using jsdelivr, set your Associated ad technology provider:
As of August 2020, privacy regulations have changed such that new creatives entered in GAM may require a declaration of the ad technology provider. The first step is to note the domain you serve the creative from. The examples above offer the use of the jsdelvr CDN. However, you may obtain the creative from a managed service or you may host it yourself. If you receive a warning from ad manager about “declaring self-created ad technology”, you should be able to work around this by editing the creative and filling out the “Associated ad technology providers” section as shown in this screen capture:
- Click Save and preview.
Create Mobile In-App Template
Use these instructions if you integrate In-App native ads on iOS or Android. The difference is in choosing the GAM option for supporting Android & iOS app code.
- Sign in to Google Ad Manager.
- Create an ad unit with fluid ad size.
- Click
Deliveryand thenNative - Click
New native style. - Click
Android & iOS app code. - Name your new format.
- Choose
Add variableand add the following variable names and placeholders as typetext.
| Variable Name | Placeholder | Type |
|---|---|---|
| isPrebid | [%isPrebid%] | Text |
| hb_cache_id_local | [%hb_cache_id_local%] | Text |
Make sure to indicate that the variables are required.
- Hit “Save”.
- Return to the home screen, click
Delivery > Creatives, and create a creative withNative Format, choosing the format you created. - Choose a creative name and other desired settings. In the user-defined variables you just created, set the following values:
| Variable Name | Value |
|---|---|
| isPrebid | 1 |
| hb_cache_id_local | %%PATTERN:hb_cache_id_local%% |
- Create Prebid line items with price priority and a display ad type that is targeting
hb_pb key-values. Associate the creative you added in steps 4 thru 8 (making sure to choose your native format as expected creatives on the line item) to the ad unit you created in the second step.
Attach the Creative to Your Line Item
Follow the instructions in Google Ad Manager with Prebid Step by Step to duplicate your creative and attach it to your line item.